
I’m broadcasting live now! Join me!
In this tutorial, I’ll show you how to set up a Raspberry Pi 4 as a development (or test) server. You can use this as a place to push your code and test it in a web browser. For the demo, I’ll be using a React app, but with a few tweaks, you can build almost anything with it.
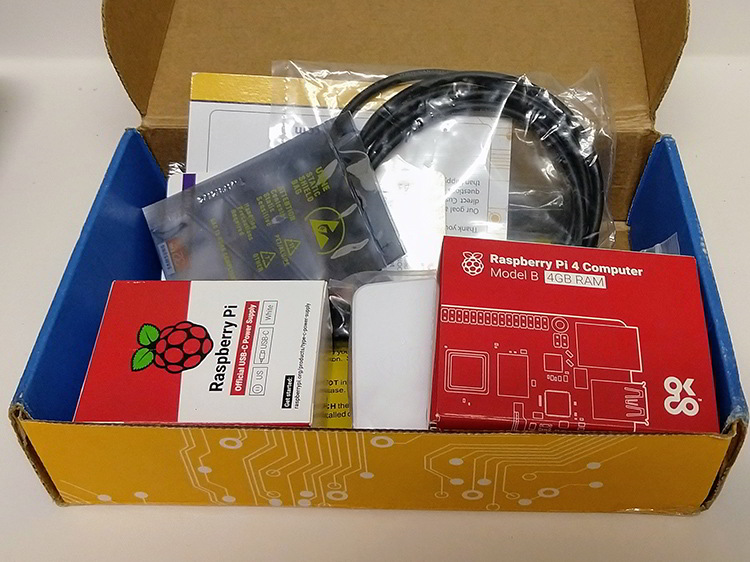
For this project, I am using a Canakit Raspberry Pi 4 Complete Kit. It gives you everything you need to get started, including a case, power supply and SD card.
Why bother?
A solid development environment is important. You need a place where you can look at your application to make sure it’s working properly. Many times people do this on their local computer. Better to test on a separate machine from what you are working on. This way, you can catch things like dependencies and configuration changes.
This development/testing server has the following benefits:
- Configuration and environment compatible with production (if you have a Linux host)
- Building code on each machine pushed it to a central location
- Continuous integration – push and refresh in your browser
Ideally, you can set up a workflow that looks like this: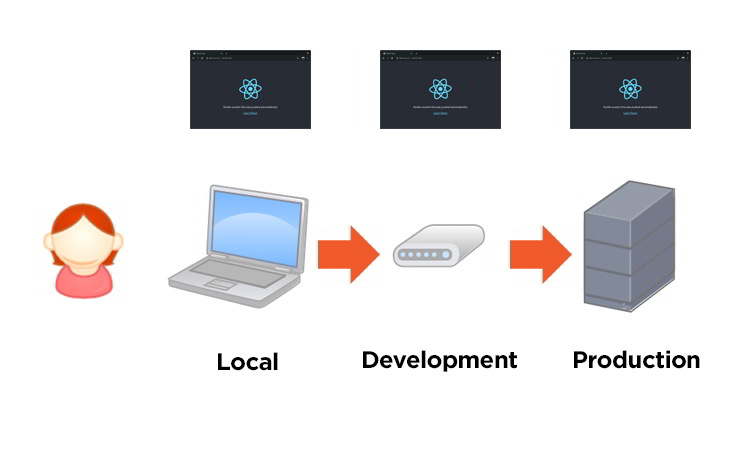
- Open your code locally and do it.
- Push to develop and test it
- Confirm changes, push it live
This allows for a great workflow where you can make changes and edits, commit, and then push them and refresh your browser. You can then develop your code from any machine on the network that has git. Once you’re happy with the changes, you can copy the objects to production. In fact, you can integrate production urgency into this workflow to automate everything.
Setting up the Pi as a server
For this project, I’m using full Canakit Raspberry Pi Kit. It comes with everything you need. I won’t go into that definition in this article, but I should note that I use Ubuntu server image for this project, and recommend you do the same.
I used mine Pinebook pro to burn the image to the card, but you can do it on Windows or with a Mac if you need to.
Here is a good guide To define one of these sets.
We’ll set this up as a development/test server and use GIT to communicate with it. So here’s what we did:
- Configure Git for publishing
- Install Nginx
- Install NPM
- Deploy from a repo on your computer to the Raspberry Pi web server in one step.
When we’re done, we can modify our React app and push the changes to the Pi to display as a web page.
1. Set up Git for publishing
Location: On Raspberry Pi
First we need to install Git.
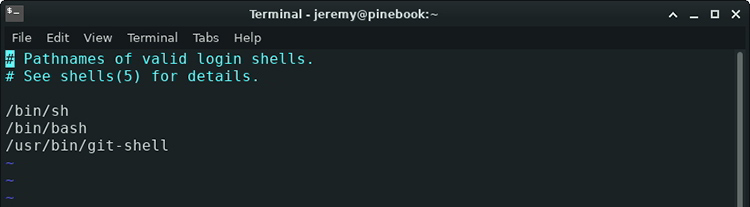
Now we need to move shell to /etc/shells
and add this output to /etc/shells
Now we want to set up a git user that doesn’t have the cool permissions that your account has.
sudo adduser --disabled-password git
Switch to the git user
Change to the git user home
Create a directory for ssh files
mkdir ~/.ssh && chmod 700 ~/.ssh
We will create our authorized_keys file
touch ~/.ssh/authorized_keys && chmod 600 ~/.ssh/authorized_keys
Now you can add the public keys of each computer you want to access the server by adding them:
/home/git/.ssh/authorized_keys
Next we will set the git users shell to git-shell
sudo chsh git -s $(which git-shell)
Create a folder for our www files that we will access later:
2. Create our project folder
Location: On Raspberry Pi
This is a remote repository set up so we can work on the project on any other machine, then push it to the Raspberry Pi.
cd ~
mkdir /home/git/react-hello-world.git
Now, let’s start it:
cd react-hello-world.git && git init --bare
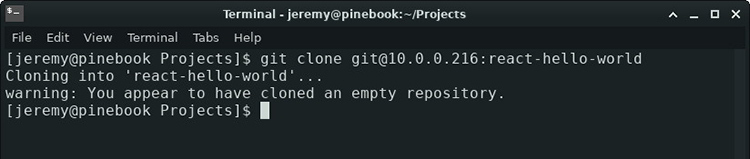
Let’s go back to our machine and check it out.
On your developer computer, type:
git clone git@[your IP address]:react-hello-world .
You should be able to replicate it on your local computer.
If it works, we’ll go back to the Raspberry Pi.
3. Install Nginx
Location: On Raspberry Pi
Next, we will install Nginx on our Raspberry pi and use it to serve web pages.
In this tutorial, we will define it for a single project, so we will use a single www directory. However, if you have multiple projects, you want to divide them into folders.
This will install Nginx.
You may need to add a firewall exception to ufw. You can list the available profiles by typing:
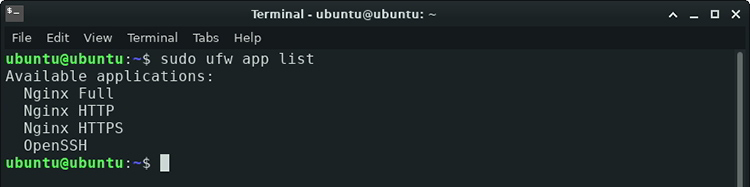
You can add an exception with:
sudo ufw allow 'Nginx HTTP'
Now when you upload the IP in the web browser, you will see the Nginx splash page.
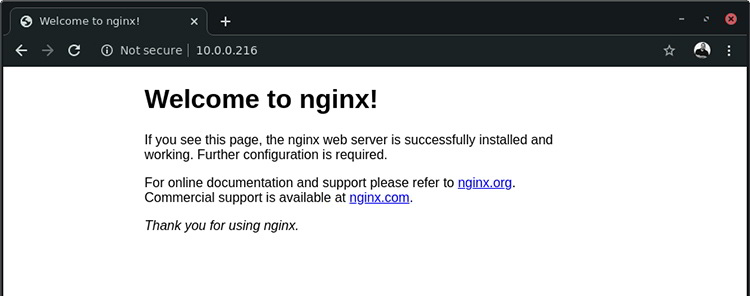
You now have an Nginx server running.
4. Configure Nginx
Location: On Raspberry Pi
Next, we will change the Nginx configuration.
Make a copy of the default configuration in your home folder as a backup:
sudo cp /etc/Nginx/sites-available/default ~
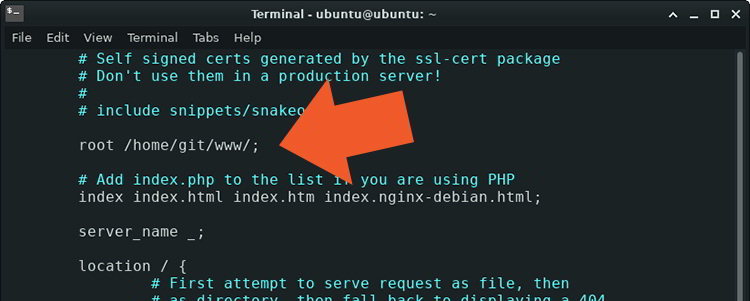
Edit the conf file and add in the www folder we created earlier.
sudo vim /etc/Nginx/sites-available/default
Search for “root” and change the default to our www folder:
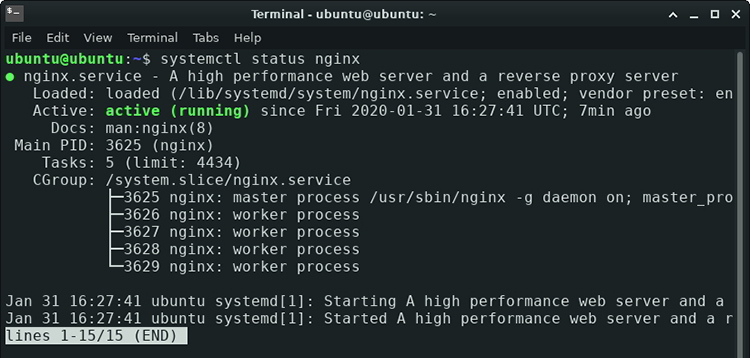
Then save the file and reload Nginx.
sudo systemctl reload Nginx
You are now serving files from the www folder instead of git. This is where we publish files after a commit.
Let’s go back to our developer computer.
5. Set up our React project
Location: On your developer computer
We will build a React project and deploy it to our Pi. So let’s determine it.
First, we’ll remove the repository we cloned earlier.
rm -rf react-hello-world/
And we’ll use the React CLI to create an app with the same name.
npx create-react-app react-hello-world
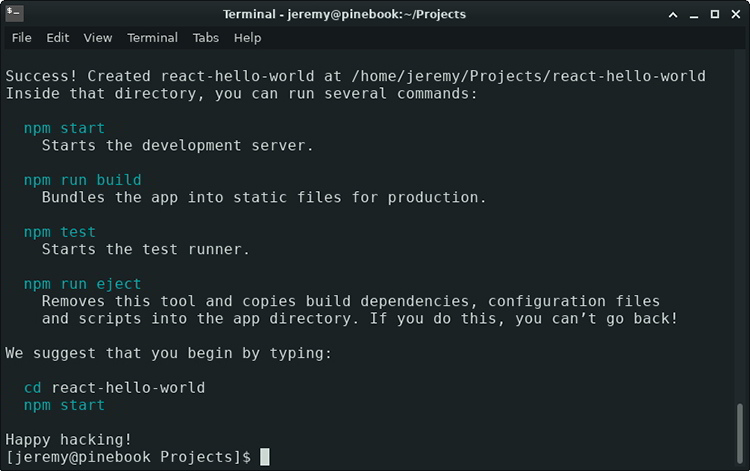
We have now created a basic React project. Then, initialize it as a git repository.
We will add our existing files and execute them.
git add .
git commit -m "Our first commit"
We will direct the remote to our Raspberry Pi. We set it up so that when we push it away, the files will go to our Raspberry Pi.
git remote add origin git@[Your IP Address]:react-hello-world.git
And we’ll push it to the Raspberry Pi:
git push --set-upstream origin master
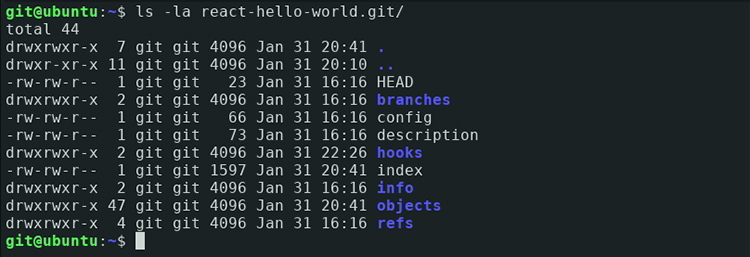
If you go to Pi, you’ll see the repository in your react-hello-world.git folder:
Now that we have that setup, we need to configure the Pi to build your React app.
6. Configure the server to build
Location: On Raspberry Pi
We’ve set up our remote Git repository, and Nginx is installed, but we need to tie it all together. We need to build our app.
Now we need to install Node and NPM on the Raspberry Pi to get started.
curl -sL https://deb.nodesource.com/setup_10.x | sudo -E bash -
sudo apt install nodejs
You can verify that they are installed by typing:
node --version
npm --version
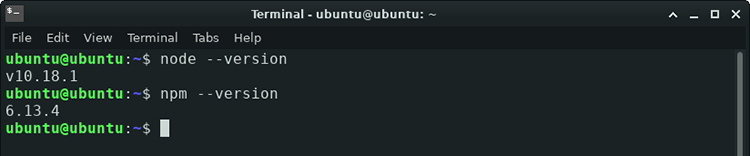
We now have Node running.
7. Set response to build
Location: On Raspberry Pi
Let’s build our React app on the Raspberry Pi, just to test it.
Check the local repository:
cd ~ && git clone react-hello-world.git/ test
After that we will install react and react scripts (-g makes it global)
npm install react -g
npm install react-scripts -g
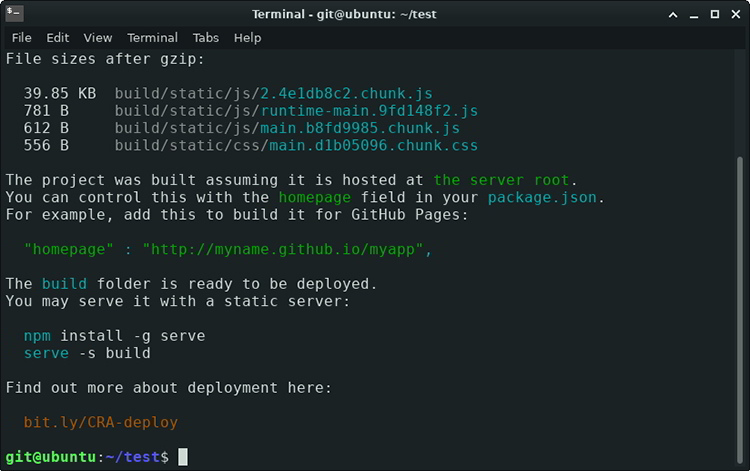
If we run:
We can see it built properly.
Once we know we can build the React app manually, we can automate it.
8. Tie it all together
Location: On Raspberry Pi
Now we need to copy these files to our www folder. We want to do this automatically every time we push to a git repo.
Make sure you are in the remote git folder on the Raspberry Pi (for me it’s /home/git/react-hello-world.git/)
and create a new file:
Add:
#!/bin/bash
unset GIT_INDEX_FILE
echo "Publishing our React App"
git --work-tree /home/git/build --git-dir=/home/git/react-hello-world.git checkout -f
cd /home/git/build
npm run-script build
cp -r /home/git/build/build/* /home/git/www
Use your folder names for this. I created a /home/git/build folder, and its job is to hold the source files and build them.
What this file does is create a hook after receiving in git, so after you push away, those actions will be triggered.
- This checks the repo into the build folder
- Runs a build script
- Copies the objects to our www folder.
There are several different ways you can do this, but this is a simple way to build and push the application to the www folder.
You can build the app locally and just commit/push objects. I build it on the “server” (our Raspberry Pi). This is a better way to do it because you can match your Raspberry Pi to your production server and just push the source to be built automatically. You don’t have to worry about a configuration change on your development machine that won’t be on your production machine. This enforces some consistency.
You can also run tests here if you want.
After you finish adding these changes, mark the file as executable.
chmod +x hooks/post-receive
9. Testing your integration
Location: Your local machine and the Raspberry Pi
Now it’s time to check everything. In your React app, open App.js and make some sort of change.
Add it and do it.
git add .
git commit "small change"
git push origin master
You will see output from your remote:
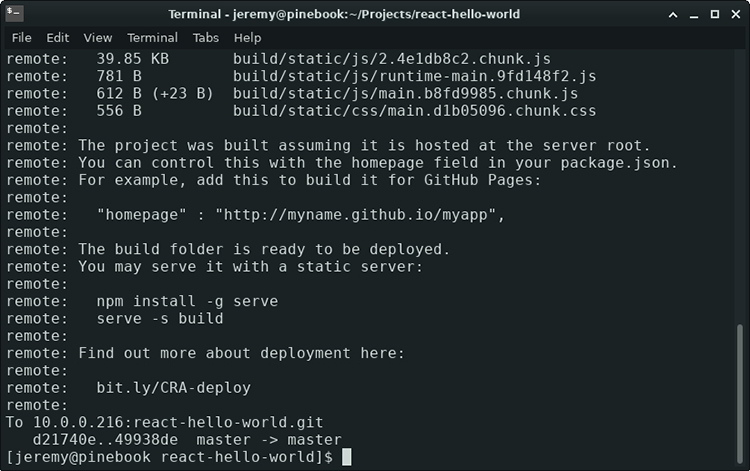
Now you are ready to test it in a web browser!!!
This is what we’ve been waiting for!
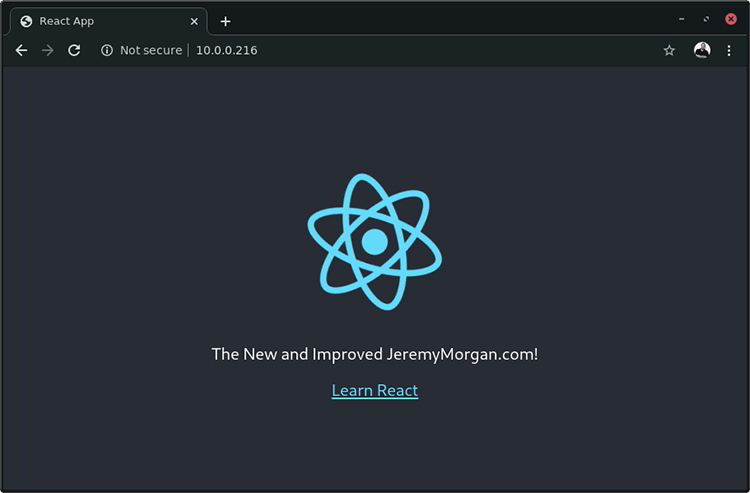
There is my React site in all its glory.
Now, I can update this application by:
- make changes
- Deposit
- pushing to master
All within seconds, I can see the results of my changes. Easy and simple. You can easily extend it, so you push it here, do a spot test and then push it to a staging or production server. The possibilities are endless.
10. Start developing!
I created this tutorial with a React app as an example, but it could just as easily be Angular, Vue, Golang, Python, PHP, or anything else. The concepts are the same. Hopefully this will speed up your workflow and give you a nice place to test and test your app before you push it live.
It’s not exactly an enterprise solution, but it’s a cheap alternative to an actual server.
Here’s how I set it up:
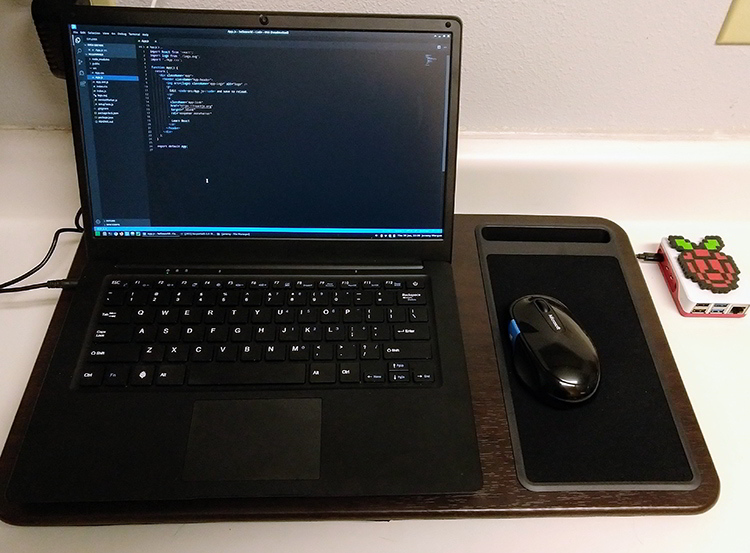
I used my Pinebook Pro as the development machine for this article. What you’re looking at here is a fully capable development setup for ~$300. I could easily develop tons of apps and push them to production with this setup. Thanks to ARM processors and the tireless work of innovators such as Raspberry Pi Foundation And the The Pine64 project.
What do you think? Yell at me on Twitter And let me know!
Want to learn more about Raspberry Pi? Check out the Raspberry Pi for developers Course!