
I bought the EPEVER Tracer MPPT Solar Charge Controller 6 months ago from Ali Express , to this day it works in good condition. The model I purchased was 4210AN, this model supports a rated charging current of 40A, which is suitable for my current solar panel setup. In this post I will share how to choose the right base of the MPPT charge controller on your necessary solar panel setup, how to install and mount it to the power panel, how to program and configure the EPEVER solar charge controller, finally I will provide my honest review about this product.
Note : This is not a sponsored post, just my honest review after using the product.
Before purchasing the EPEVER mppt solar charge controller, I will need to calculate what the total charge current of my existing solar panel setup is.
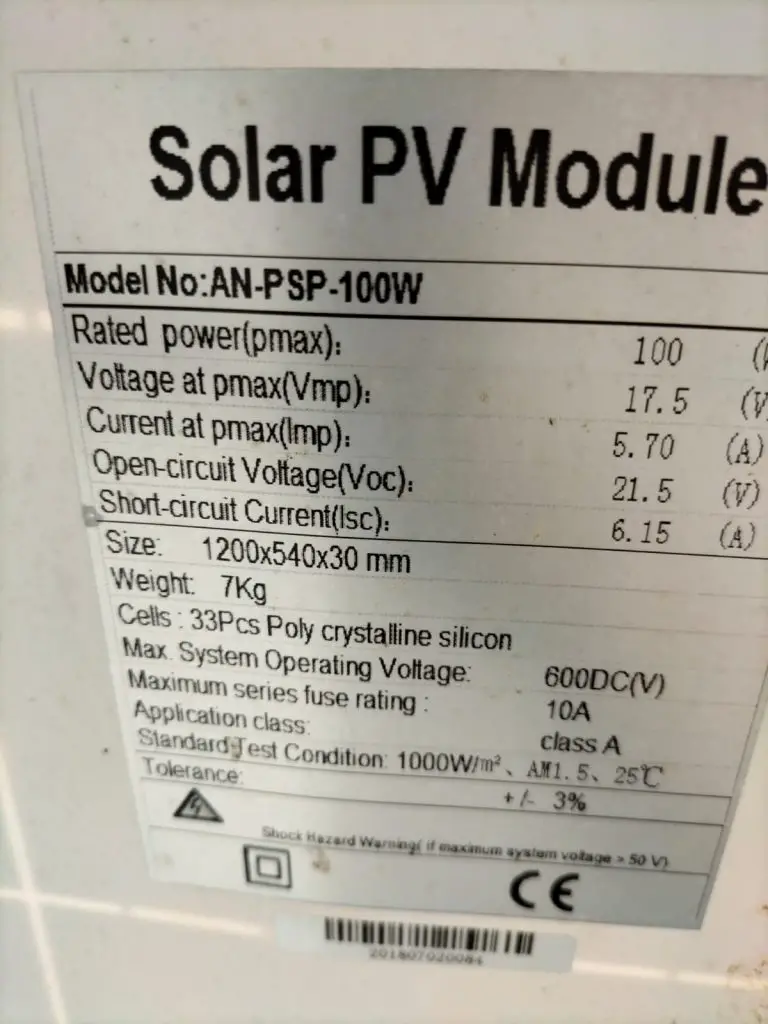
My current solar setup is connected in parallel, with 5 pieces of 100W Power 18v solar panel with a rated charging current of 7A per piece.
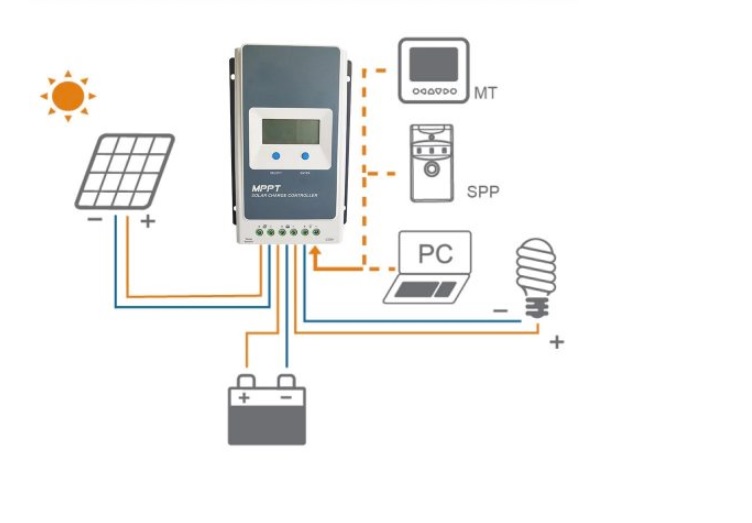
The diagram below shows my current solar panel wiring setup
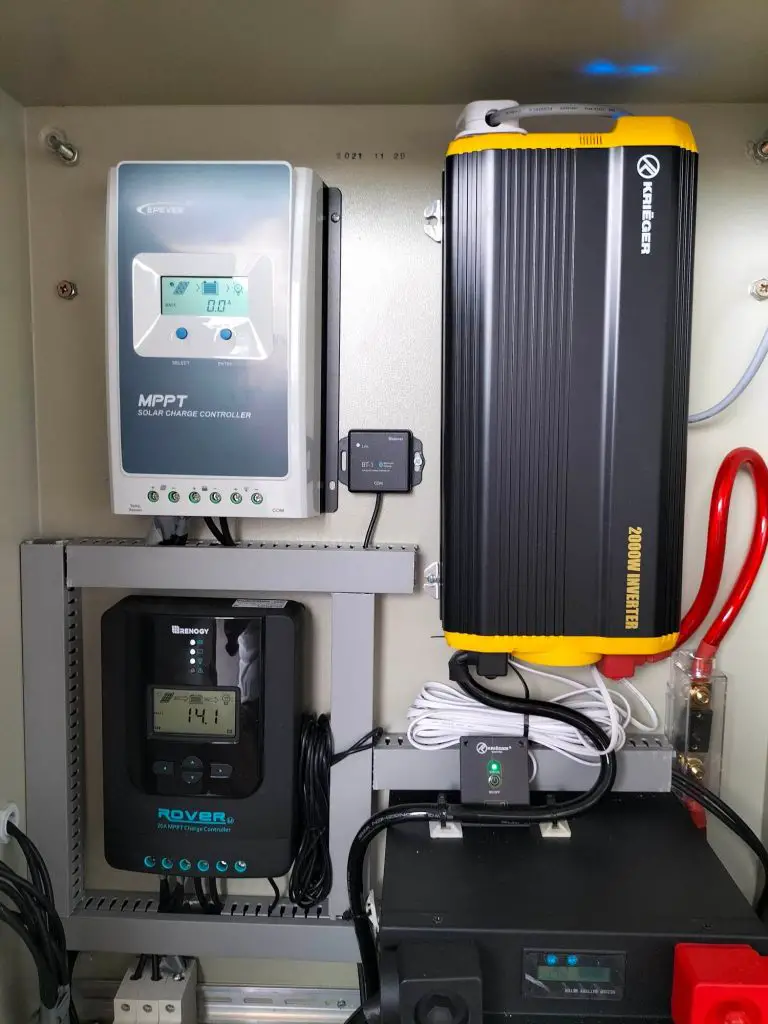
Below is the actual physical setup

How to calculate the current of a solar panel connected in parallel?
The total output current is the resulting summation of all the rated output current of the solar panel connected in parallel
Total current = 7A +7A+ 7A+7A +7A = 35A
I would assign a Safe Margin Factor of 15% on the total rated current
New total current with a safety margin of 15% = 35A x1.15 = 40.25A
Therefore I will need to purchase an MPPT Charge Controller with a charge current equal to or greater than 40.25A.
Where and how to get a suitable MPPT charge controller?
There are several places online where you can get a suitable MPPT Solar Charge Controller. E-commerce sites such as Amazon, Aliexpress, Alibaba, Lazada, Shopee, etc. have lots of sellers selling different brands of MPPT Solar Charge Controller.
I bought the EPEVER MPPT charge controller from AliExpress. Before purchasing the controller, please be sure to identify the correct model you will need to purchase based on the calculated total output current of your solar panel setup.
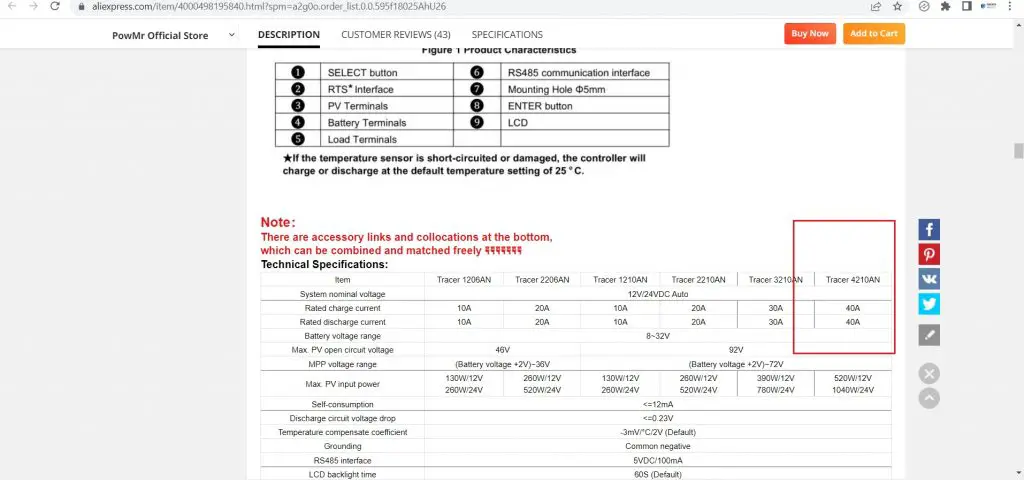
Identify the correct model
How to mount the MPPT solar charge controller to your power panel?
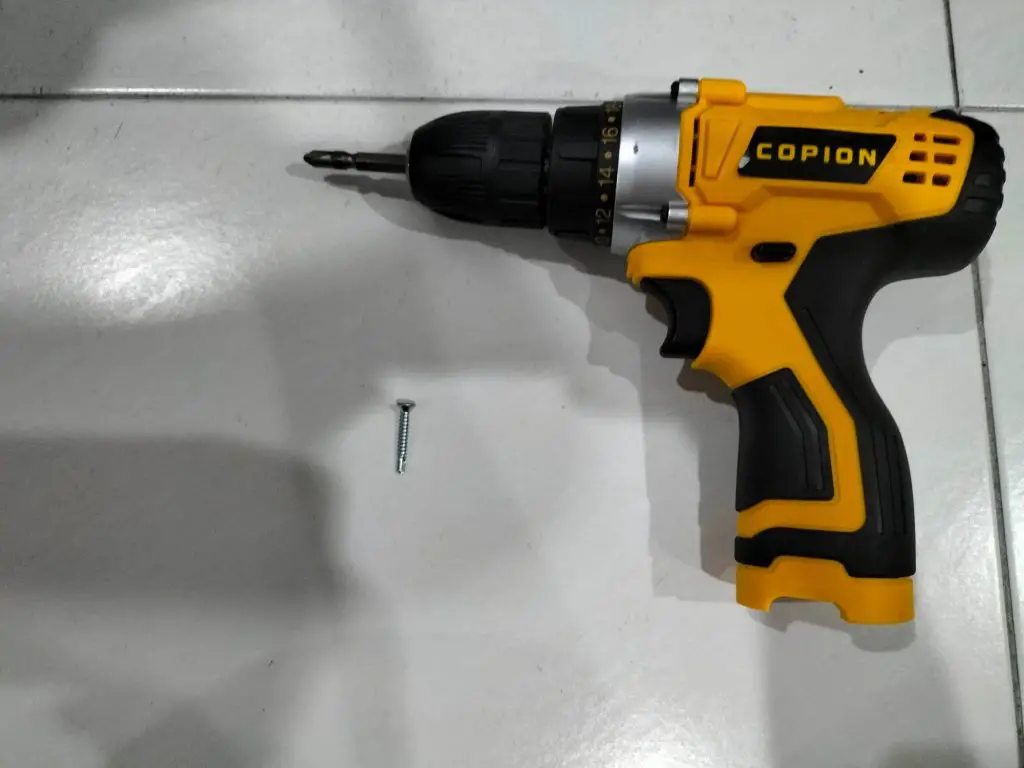
To mount the solar charge controller to your electrical panel, you’ll need some self-tapping screws, a battery-powered electric drill, and a Phillips screwdriver.
Step 1-> Mark the area you are going to drill
Step 2-> Make sure all power source and switches are off
Step 3 -> Start drilling
How to connect EPEVER MPPT solar charge controller
Before connecting solar panel wiring and battery wiring to the EPEVER solar charge controller. We will have to identify what size cable we will need for our systems.
For solar panel PV wiring
The PV wiring size of a solar panel is determined by its ISC (short circuit). You can find this information on your PV specification label.
Calculation of ISC for a solar panel connected in parallel
When PV modules are connected in parallel, the total ISC is equal to the sum of the unit PV Module ISC.
Calculation of ISC for a series connected solar panel
When PV modules are connected in series, the final ISC value of the system will be equal to the PV panel with the smallest ISC value.
PV input current and maximum PV wire size please refer to the table below (I took this table from the EPEVER manual)
| model | Maximum PV input current | Maximum PV wire size |
|---|---|---|
| Tracer 1206AN/Tracer 1210AN | 10A | 4mm2/12AWG |
| Tracer 2206AN/Tracer 2210AN | 20A | 6mm2/10AWG |
| Tracer 3210AN | 30A | 10mm2/8AWG |
| Tracer 4210AN | 40A | 16mm2/6AWG |
battery wire size and charging, See the table below (I extracted this table from the EPEVER manual)
| model | Rated charging current | rated discharge current | Battery wire size current | Load wire size |
|---|---|---|---|---|
| Tracer 1206AN/Tracer 1210AN | 10A | 10A | 4mm2/12AWG | 4mm2/12AWG |
| Tracer 2206AN/Tracer 2210AN | 20A | 20A | 6mm2/10AWG | 6mm2/10AWG |
| Tracer 3210AN | 30A | 30A | 10mm2/8AWG | 10mm2/8AWG |
| Tracer 4210AN | 40A | 40A | 16mm2/6AWG | 16mm2/6AWG |
Various electrical parts you will need before connecting the PV wire and battery cable to the MPPT charge controller
Switch from solar panel to MPPT charge controller
In order to protect any surge current from your PV system, it would be safer to install a circuit breaker between the PV and the MPPT charge controller.
Note that the solar panel produces direct current. Therefore, the type of circuit breaker we need to look for, will have to be a DC type circuit breaker.
We can purchase single pole type DC breaker or double pole type DC breaker. If you planned to use a single pole type DC breaker, only the positive pole cable needs to be connected to the breaker, while the negative pole cable you will need to splice it together or link it with some bus bar. But if you planned to use a two-pole DC breaker, both a positive pole cable and a negative pole cable from the PV panel would be connected to the breaker.
For my system I use a 32A and a 16A breaker, as I couldn’t find a 40A breaker available.

MPPT battery charge controller circuit breaker
An MPPT charge controller circuit breaker may not be needed for the battery, as the charging current is regulated by the MPPT charge controller. But it would be an advantage to add a circuit breaker in between, if under certain circumstances the user can disconnect the charging current from the solar charger to the battery without disconnecting any cable.
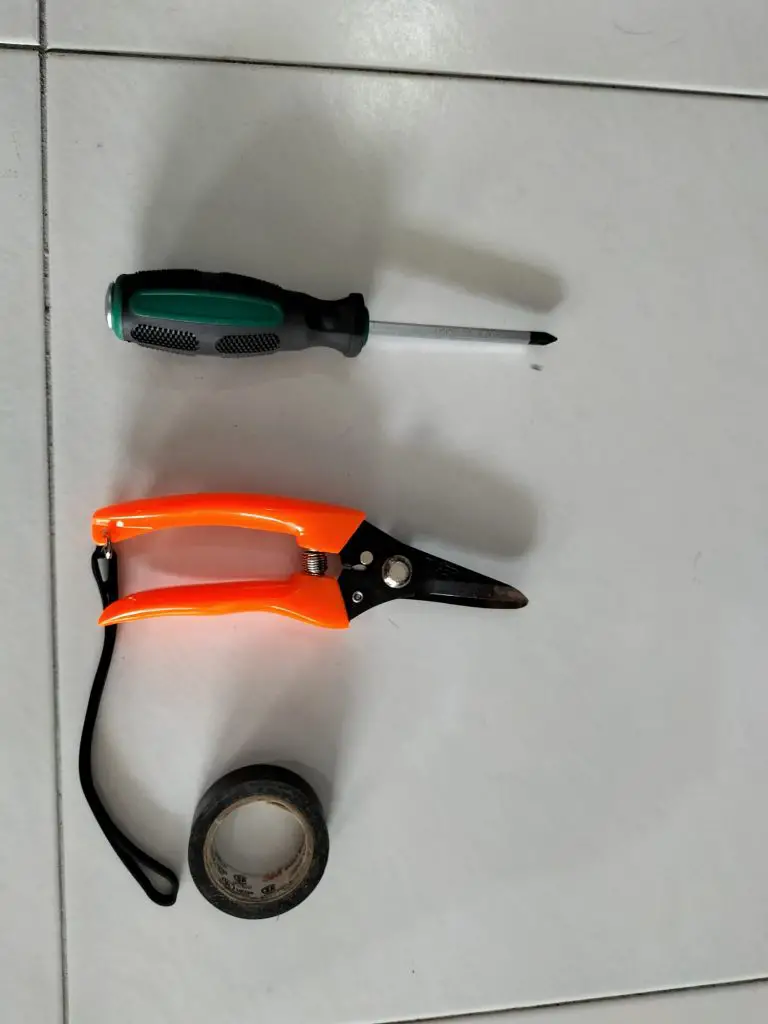
Tools you will need to connect the solar panel cable and battery cable to your MPPT charge controller
Ok, now we have the correct size of cable and equipment, the next step is to connect everything.
We will need some tools
- cutter
- thread remover (it’s a plus)
- Phillips / flat head screw
- Electrical tape
Connection as below
How to program and configure EPEVER MPPT Charge Controller
Basically there is no need to make many settings
The only main thing we will need to configure is to configure the correct battery type
Setting battery type
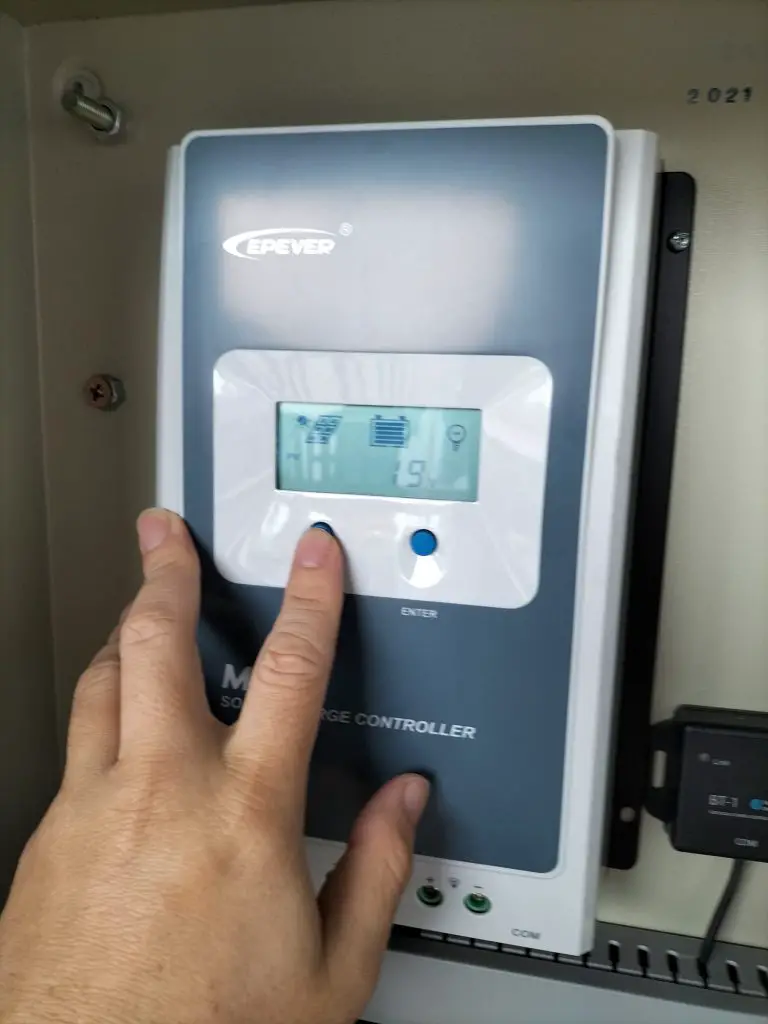
Step 1 -> Press the radio button until you see the battery voltage interface
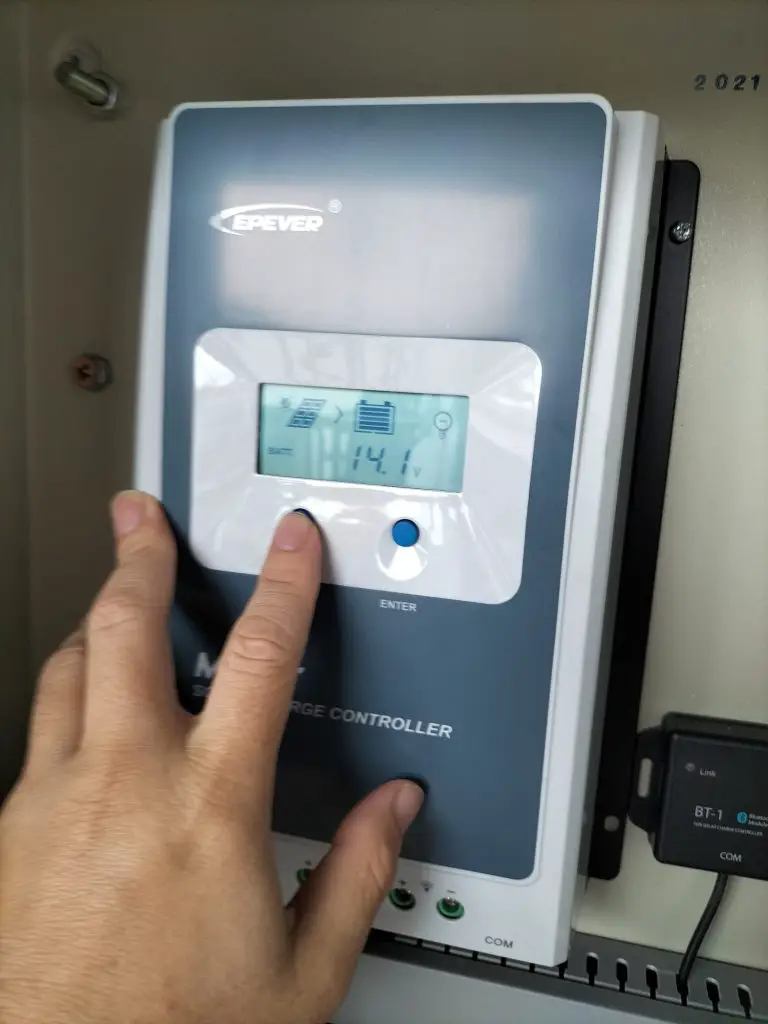
Step 2 -> Press and hold the Enter button until you see the battery type interface flashing
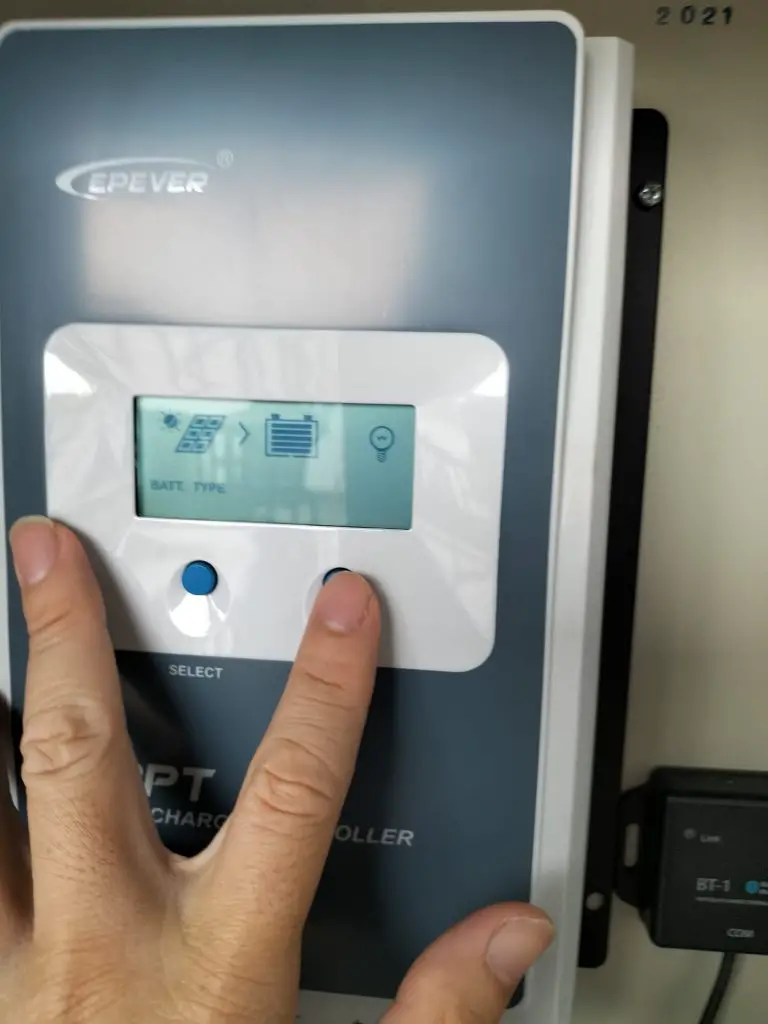
Step 3 -> Select a button to change the battery type. In my system I use a lithium ion battery so I choose F04
Verify that your installation and configuration are working correctly
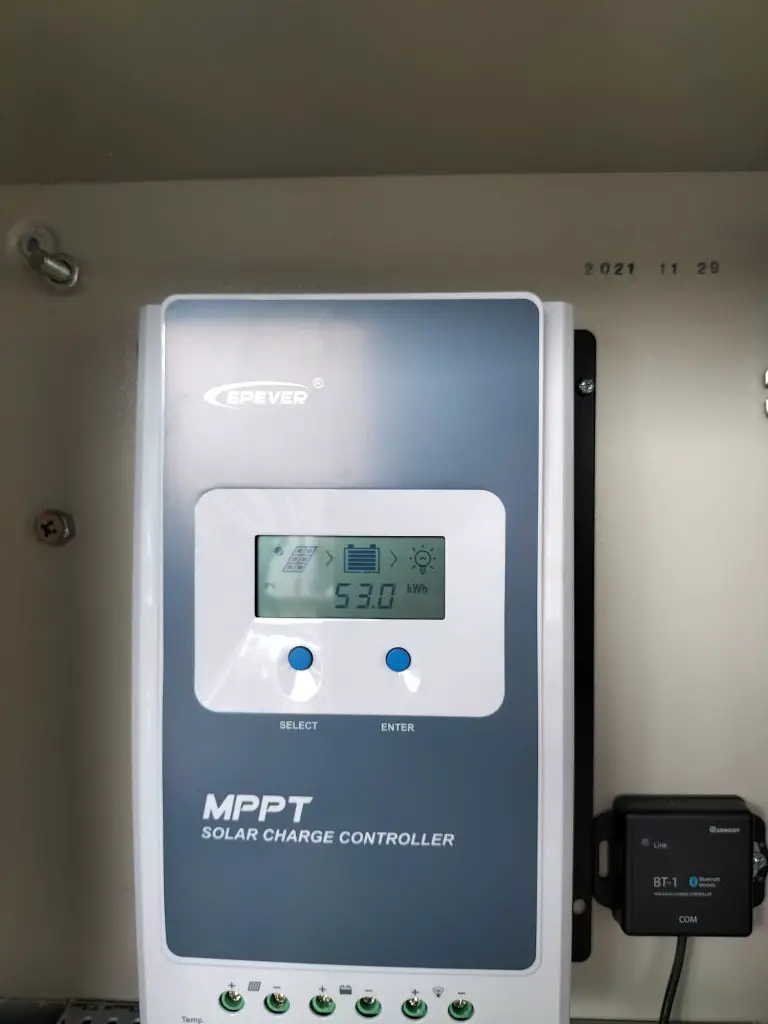
First authentication-> Press the select button and go to the PV screen, you can see sun icon / solar panel / battery and kwh. This indicates that your panel is charging the battery
Second authentication-> Press the select button and go to the battery screen, you can see sun icon / solar panel / battery and kwh. This indicates that your battery is charging
third verification-> Click the select button and go to the PV voltage screen, check if the PV voltage is around your solar panel voltage specification
Ok, if all the above check points are good, congratulations your installation and configuration is successful.
How to troubleshoot EPEVER MPPT solar charge controller
Life is not always as smooth as it should be, now you may run into trouble
Below is the table I extracted from the EPEVER manual, you can use it as a reference for troubleshooting
| faults | faults | troubleshooting |
|---|---|---|
| Open circuit PV array | When there is plenty of direct sunlight on the PV array, the LCD displays a crescent moon sign | Check if the connection of the PV array is correct and tight |
| Battery voltage is lower than 8V | The wire connection is fine, but the controller does not work | Please check the voltage of the battery (at least 8V voltage to operate the controller) |
| Battery overvoltage | Battery frame flashing | Check if the battery voltage is higher than OVD (over voltage cut-off voltage) and disconnect the PV connection |
| empty battery | Battery frame flashing | When the battery voltage is restored tp or above LVR (low voltage reconnection voltage) the load will recover) do other ways to recharge the battery |
| overload | Load off | Please reduce the number of electrical devices |
| load and fault | Restart the controller or press the button to clear a fault | |
| short circuit load | Check loader connections carefully and clear the fault
Restart the controller or press the button to clear a fault |
My personal review for EPEVER MPPT solar charge controller
The controller, installed and running in my solar system for almost half a year. Current it is still in good working condition. The unit dissipated heat very well, so far I have not encountered a situation of equipment overheating. Functionally it works well, and I haven’t encountered any crashes.
Check out my other one DIY post